Sending E-mail Campaigns
E-Mail Campaigns
About 2.5 billion people worldwide use email. It’s no secret that effectively connecting to your customers via email is crucial. Incomaker makes it easy to send vibrant, aesthetically pleasing email campaigns to all of your customers.
How To Create an Email Campaign
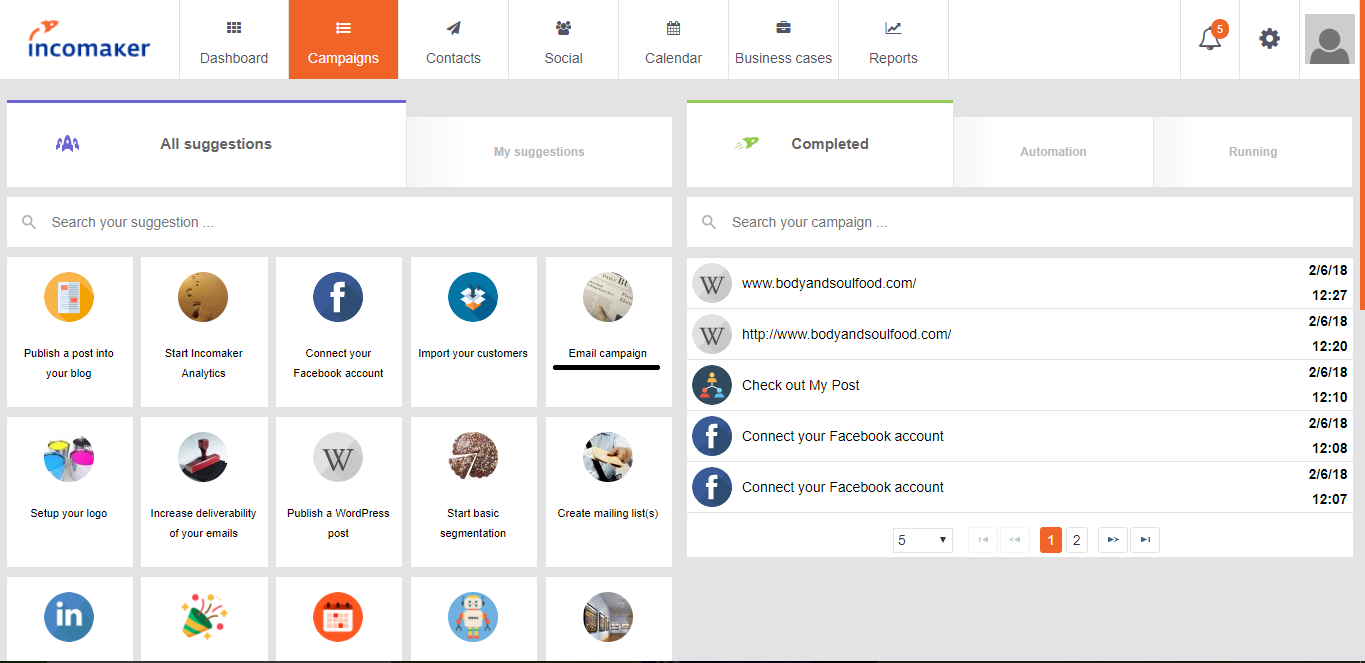
To create an email campaign, select Campaigns and then click the Email Campaign button.

You will then have to choose a template for your email. You can choose from a variety of Incomaker’s premade templates or start from fresh and create your own by selecting New Template. Every time you create a new template, Incomaker will autosave it so you can easily use your created template again.
Before you begin to customize your email campaign, make sure to verify your email. This can be done by adding your email to the from email box and then clicking the Verify email button. Check your inbox, open the verification email, and select Click to Verify Email Address.
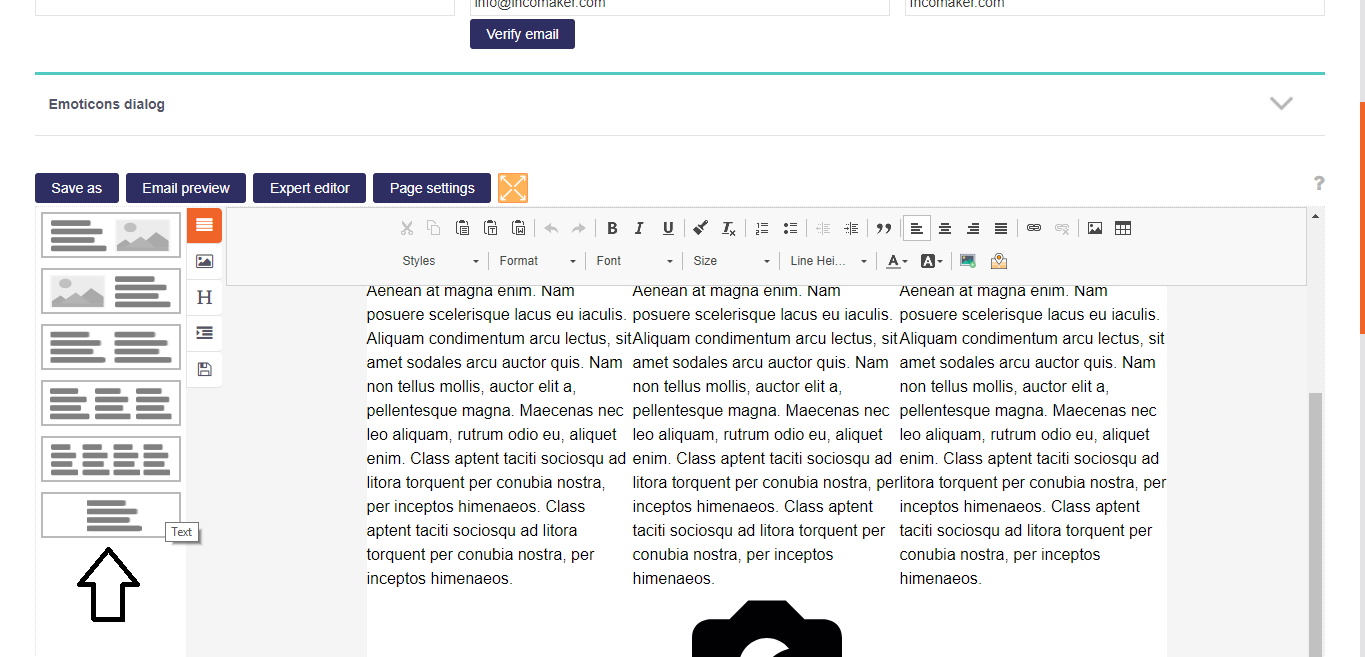
After successfully verifying your email address, it is time to customize your email campaign. A good way to start your email is to select some of our premade blocks. For example, you can select a block with an image on the left and text on the right.

You can change font sizes, format, styles, and much more. dragging and dropping different sections. Incomaker also offers you the ability to use placeholders and insert images. The possibilities are nearly endless. Select Next when you have finished customizing your email.
You will now have the option to pick the audience you would like to send your email campaign to. Under “Static segments” you can select any of your available segments and all customers in it will appear in the mailing list. You are also able to individually add contacts by clicking Add contact manually and searching their name.
You can deselect individual contacts using the X button on the right hand side, or you can deselect the entire segment using the Deselect button. Under “Dynamic segments” you are able to add filters based on area or the event.
To send your email immediately, select Send and Complete.
Need approval from your boss before releasing this campaign? Check the box next to Approve this content? And select the user from the drop down menu that you would like it to be sent to for approval.
Don’t want to send the campaign immediately? Simply check the box next to Schedule for later and choose the date and time you would like the campaign to be sent.